As an Admin at ReviewingTV.com, with over a decade of hands-on experience in testing, evaluating, and repairing vacuum sealers, I understand the critical role these machines play in modern food preservation. From compact kitchen models to robust industrial units, I’ve seen it all. A perfectly functioning vacuum sealer is your best ally against food waste, but even the most reliable machines can falter. Often, the culprit is a small, seemingly insignificant component: the gasket. If your vacuum sealer isn’t performing as it should, there’s a good chance a worn-out gasket is to blame. Let’s delve into the world of vacuum sealer gaskets, learn how to spot signs of wear, and discover how to replace them yourself, ensuring your food stays fresh and your appliance runs smoothly for years to come.
What Are Vacuum Sealer Gaskets and Why Are They Crucial?
At its core, a vacuum sealer works by removing air from a bag and then sealing it to create an airtight environment. The unsung hero in this process is the gasket. Typically made of rubber or foam, these flexible strips are strategically positioned around the vacuum chamber and/or lid of your machine. When the lid is closed, the gasket compresses, forming a perfect, impenetrable seal that prevents air from entering or escaping during the vacuuming and sealing cycles.
This seemingly simple component is absolutely vital for effective food preservation. Without a proper seal, your vacuum sealer cannot achieve or maintain the necessary vacuum pressure. This means air will leak back into your food bags, negating all the benefits of vacuum sealing – accelerated spoilage, freezer burn, and loss of flavor and nutrients. A faulty gasket isn’t just an inconvenience; it can lead to wasted food and undo all your meal prep efforts.
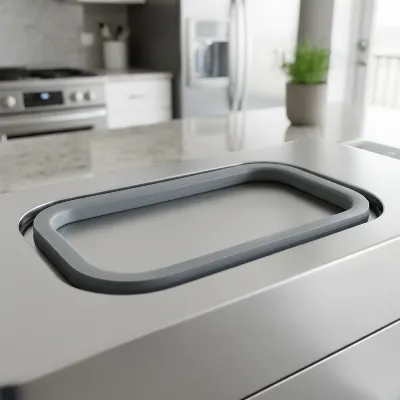 Close-up of a perfectly fitted vacuum sealer gasket in its channel, highlighting its smooth, flexible rubber material and precise placement within the appliance, with a subtle background blur of a modern kitchen counter
Recognizing the Signs: When to Replace Your Vacuum Sealer Gasket
Knowing when to replace your vacuum sealer gasket is key to proactive maintenance. While a general guideline is helpful, observing the specific performance of your machine is even more important. A gasket’s lifespan can vary, but there are clear indicators that it’s time for a change.
Loss of Vacuum Pressure or Incomplete Seals
|
Our Picks for the Best Vacuum Sealer in 2026
As an Amazon Associate I earn from qualifying purchases.
|
||
| Num | Product | Action |
|---|---|---|
| 1 | Chef Preserve Compact Vacuum Sealer for Food (Vacuum Sealer Machine + 30 Reusable Vacuum Bags) Powerful Handheld Vacuum Sealer Machine, Seal Meal Saver, Portable Food Sealer |

|
| 2 | FoodSaver Vacuum Sealer Machine, Automatic Bag Detection, Sous Vide Friendly, with sealer bags, roll, handheld vacuum sealer, black |
|
| 3 | 90KPa Portable Vacuum Sealer Machine for Food, One-Touch Open Lid, Detachable & Easy to Clean, Vertical Placement Saves Space, Powerful Suction for Freezer Bags & Food Storage |
|
| 4 | FoodSaver PowerVac Compact Vacuum Sealing Machine Stainless Steel & Black Vertical Storage VS0150 | Preserves freshness reduces bag waste for both dry and wet food |
|
| 5 | Nesco Deluxe Food VS-12 Vacuum Sealer, 130 Watts, Kit Bags & Viewing Lid, Compact, Silver |
|
| 6 | Mesliese Vacuum Sealer Machine Powerful 90Kpa Precision 6-in-1 Compact Food Preservation System with Cutter, 2 Bag Rolls & 5 Pre-cut Bags, Widened 12mm Sealing Strip, Dry&Moist Modes (Silver) |
|
| 7 | 95kPa Precision Vacuum Sealer Machine, Double Heat Seal for Dry/Moist Food, Easy-Lock Handle, Built-in Bag Storage & Cutter, Progress Display, Pulse Mode, Removable Drip Tray, Silver |
|
| 8 | Anybear Vacuum Sealer Machine, 90kPa 120W Wide Seal All-IN-1 Powerful Food Storage, Build-in Cutter | Bags Storage | Digital Countdown Display | 2 Bag Rolls and 5pcs Pre-cut Bags (Gray) |
|
| 9 | NutriChef Food Vacuum Sealer Machine - Automatic Air Sealing System for Dry & Moist Foods, LED Touch Controls, Includes Vacuum Bags, Hose & Wine Stopper, High Suction Power, 14"x6"x3", Silver |
|
| 10 | Food Vacuum Sealer Machine, Powerful & Continuous Vacuum Sealing for Kitchen Storage & Meal Prep, Wet & Dry Food Sealing, Detachable Upper & Lower Design for Easy Cleaning, Includes 50 Bags |
|
The most obvious sign of a failing gasket is if your vacuum sealer struggles to create a strong vacuum or if bags lose their seal shortly after being processed. You might notice air remaining in the bag, or bags puffing up again in the freezer or pantry. This indicates that the airtight barrier created by the gasket is compromised, allowing air to seep back in.
Visible Wear and Tear
Regularly inspect your gaskets for any physical damage. Look closely for cracks, tears, hardening, or brittleness. A healthy gasket should be supple and flexible. If it feels stiff or rigid, it’s lost its elasticity and effectiveness. You might also spot a white or chalky appearance, which is a sign the material is breaking down.
Changes in Gasket Texture or Fit
Over time, gaskets can become compressed or flattened, leading to dents that don’t rebound when pressed. They might also feel loose in their channel or show discoloration. Any unevenness, weird shapes, or a gasket that isn’t sitting straight in its groove signals it’s no longer creating an optimal seal.
Increased Effort to Seal
If you find yourself having to press down hard on the lid of your vacuum sealer to get it to engage and seal properly, it’s a strong indicator that the gasket is no longer making adequate contact on its own. This extra pressure is a workaround for a failing seal and can strain other components of your machine.
General Replacement Guidelines
For most home vacuum sealers, it’s generally recommended to replace gaskets annually for regular use. If you use your machine occasionally, they might last 1-2 years. However, for those with high-frequency commercial or heavy seasonal use, replacement might be necessary every 3-6 months. Foam seals, commonly found in many domestic models, tend to wear out quicker than their more robust rubber counterparts.
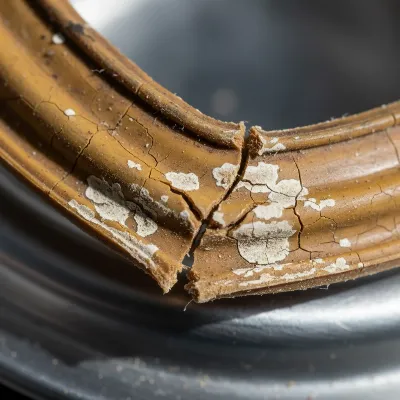 Close-up of a damaged vacuum sealer gasket, showing visible cracks, tears, and hardening, indicating wear and tear that prevents an airtight seal
Factors Affecting Gasket Lifespan
The longevity of your vacuum sealer gasket isn’t just a matter of time; several factors influence how quickly it degrades. Understanding these can help you extend its life and prevent premature failure.
Frequency and Type of Use
This is perhaps the most significant factor. A machine used daily for large batches of food, like in a commercial setting, will naturally experience more wear and tear on its gaskets than one used only a few times a month at home. The constant compression and decompression cycles take their toll.
Exposure to Moisture and Food Debris
Gaskets are highly susceptible to damage from liquids and food particles. If juices from moist foods or crumbs are repeatedly sucked into the vacuum channel, they can accumulate on the gasket. Over time, these residues can harden, making the gasket brittle or creating uneven surfaces that prevent an airtight seal. Liquids, in particular, can rapidly degrade foam gaskets.
Cleaning and Maintenance Habits
Neglecting regular cleaning is a sure way to shorten gasket life. Food debris and oils left on the gasket can cause it to lose its elasticity and stickiness. Conversely, using harsh cleaning chemicals can also damage the gasket material. A little gentle care goes a long way.
Storage Conditions
How you store your vacuum sealer matters. Storing the machine with the lid clamped shut for extended periods compresses the gaskets unnecessarily, leading to permanent flattening and reduced sealing ability. High humidity or extreme temperatures can also accelerate the material’s breakdown.
Gasket Material
The type of material also plays a role. While foam gaskets are common and effective, rubber seals are generally more robust and tend to last longer. However, even rubber seals can stretch or degrade with age and heat. Being aware of your gasket’s material can help you set realistic expectations for its lifespan.
DIY Gasket Replacement: A Step-by-Step Guide
Replacing a vacuum sealer gasket is a straightforward task that most users can handle at home. It’s an inexpensive fix that can breathe new life into your machine and save you from the cost of a full replacement.
Before You Begin: Gathering Your Tools and Parts
Before you start, ensure you have the correct replacement gasket for your specific vacuum sealer model. It’s always best to purchase OEM (Original Equipment Manufacturer) parts to guarantee a perfect fit. You’ll also want:
- A new gasket (or set of gaskets, as some machines have both upper and lower).
- A small flathead screwdriver or a plastic pry tool (optional, for stubborn old gaskets).
- Mild dish soap, warm water, and a soft, damp cloth for cleaning.
The Replacement Process
-
Safety First: Unplug the Machine. Always ensure your vacuum sealer is completely powered off and unplugged from the wall outlet before you begin any maintenance or replacement work. Safety is paramount.
-
Gentle Removal of Old Gasket. Carefully locate the gasket(s) on your machine. Gaskets are usually found around the rim of the vacuum chamber or on the underside of the lid. Gently grasp one end of the old gasket and pull it out of its channel. If it’s stuck or brittle, use your flathead screwdriver or pry tool to carefully lift one section, being mindful not to scratch the machine. Take note of how the old gasket was seated; this will help with the new installation.
-
Thorough Cleaning of Gasket Channel. With the old gasket removed, take your damp cloth with mild soapy water and meticulously clean the gasket channel. Remove any accumulated food debris, grease, or residue. A clean channel ensures the new gasket will seat perfectly and form an optimal seal. Allow the channel to dry completely before proceeding.
-
Precise Installation of New Gasket. Take your new gasket and align it with the groove in the channel. Start at one end or a corner and gently press the gasket into place. Work your way around, ensuring it sits flush and evenly in the channel. It’s crucial not to stretch or over-compress foam gaskets during installation, as this can distort their shape and compromise the seal. For some chamber sealers, you might need to trim the gasket to fit perfectly, usually leaving a tiny bit extra to ensure a snug fit.
-
Post-Installation Test. Once the new gasket is fully installed, close the lid of your vacuum sealer. Run a test vacuum cycle with an empty bag to confirm that the new gasket is creating a strong, airtight seal. Listen for any unusual noises and check for any signs of air leakage.
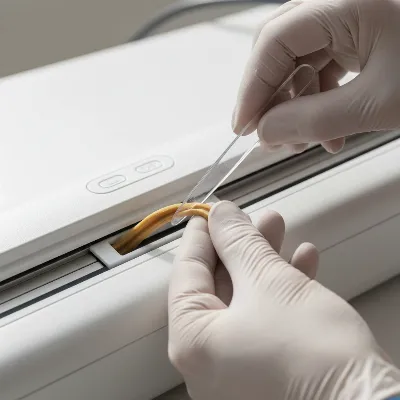 Hands carefully removing an old gasket from a vacuum sealer, demonstrating a step-by-step DIY replacement process with necessary tools like a small pry tool
Maintaining Your Vacuum Sealer Gasket for Longevity
Replacing a worn gasket is a great step, but proper maintenance can significantly extend the life of your new gasket and prevent future issues. Integrating these simple habits into your routine will keep your vacuum sealer performing at its best.
Regular Cleaning
The easiest and most impactful maintenance step is regular cleaning. After each use, or at least every few uses, unplug your machine and wipe down the gasket and the surrounding sealing area with a soft, damp cloth. This removes food particles, oils, and moisture that can degrade the gasket material. Avoid abrasive cleaners or harsh chemicals, as they can damage the rubber or foam.
Proper Storage
Never store your vacuum sealer with the lid clamped tightly shut. This continuously compresses the gasket, leading to permanent flattening and loss of elasticity over time. Instead, store your machine with the lid unlocked or slightly ajar. Many models have a specific storage position for this purpose.
Preventing Liquid Intrusion
Liquids are a major enemy of vacuum sealer gaskets. To prevent moisture from being sucked into the vacuum channel and onto the gasket:
- Pre-freeze moist foods like raw meats or fruits before sealing.
- Use the “paper towel method”: Place a folded piece of paper towel between the food and the bag opening to absorb excess moisture during vacuuming.
- If your machine has a “moist” setting, use it, but still be vigilant.
Gentle Handling
While gaskets are designed to be durable, they aren’t indestructible. Avoid using sharp objects around the gasket area, and always handle the lid gently. Slamming the lid shut can put unnecessary stress on the gasket and its housing.
Use Quality Bags
Using vacuum sealer bags specifically designed for your machine, and of appropriate quality and thickness, can also reduce stress on the sealing components, including the gasket. Low-quality bags might require more heat or pressure to seal, leading to premature wear on your machine.
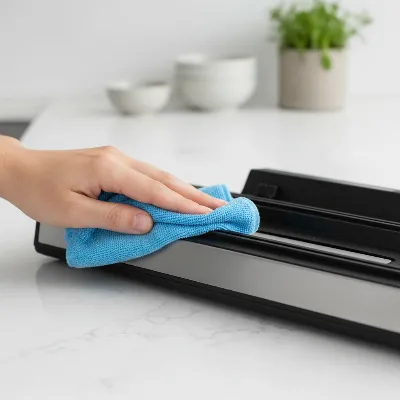 A person cleaning a vacuum sealer gasket with a damp, soft cloth, illustrating proper maintenance for extending the gasket's lifespan
Common Gasket-Related Issues and Troubleshooting
Even after replacing your gasket, you might encounter issues. Here’s how to troubleshoot some common gasket-related problems:
Weak Vacuum After Gasket Replacement
If your machine is still struggling to create a strong vacuum even with a new gasket, first double-check that the gasket is perfectly seated in its channel, with no twists, bulges, or gaps. Any misalignment can break the seal. If the gasket is correctly installed, the problem might lie elsewhere, such as the sealing bar, heating element, or even the vacuum pump itself. For example, food debris on the sealing bar or a worn Teflon tape can also lead to poor seals.
Gasket Appears Too Long or Short
This is a common issue, especially with foam gaskets that can be easily stretched. If your gasket appears too long after installation, it likely means you stretched it during the process. Carefully remove it, allow it to return to its original shape, and reinstall it without tension. If it appears too short, it could be the wrong part for your model, or it’s been compressed significantly in its packaging. Ensure you purchased the correct OEM replacement.
Persistent Leaks
If you continue to experience air leaks in your sealed bags, even with a new, properly installed gasket, it might not be a gasket issue. Check the bags themselves for small punctures, especially if you’re sealing items with sharp edges. Also, inspect the sealing bar for any debris or damage, and ensure the bag is placed flat and free of wrinkles when sealing. Moisture or oils on the inside of the bag’s opening are also frequent culprits for seal failure.
> “Often, users focus solely on the vacuum, but a clean and supple gasket is the bedrock of an effective seal. It’s the silent workhorse that ensures your food stays truly protected.” – Johnathan Vance, Lead Technician, ReviewingTV.com
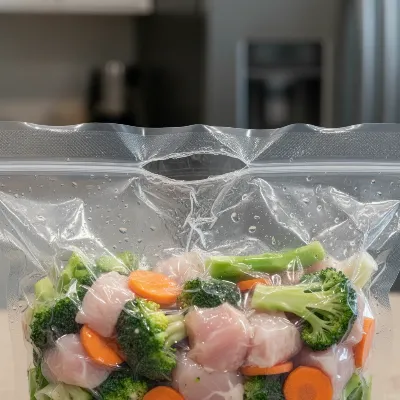 A vacuum sealed bag with visible air leaks or an incomplete seal, demonstrating common issues related to gasket problems and poor vacuuming
Conclusion
A well-maintained vacuum sealer is an invaluable asset in any kitchen, preserving freshness and drastically reducing food waste. The humble gasket, though often overlooked, is central to this performance. By understanding the signs of wear, replacing gaskets promptly when needed, and adopting simple maintenance routines, you can ensure your vacuum sealer operates at peak efficiency for years to come. Remember, a perfectly sealed bag starts with a perfectly functioning gasket. Don’t let a small, inexpensive component be the weak link in your food preservation chain.
What proactive steps will you take today to extend the life of your vacuum sealer’s gaskets?
Câu Hỏi Thường Gặp
How often should vacuum sealer gaskets be cleaned?
You should ideally wipe down your vacuum sealer gaskets with a damp, soft cloth after every use to remove any food particles, oils, or moisture. This prevents residue buildup that can degrade the gasket material and compromise the airtight seal over time.
Can I use petroleum jelly or oil on my vacuum sealer gasket?
It is generally not recommended to use petroleum jelly or other oils on your vacuum sealer gasket. While some older models or specific materials might tolerate it, these substances can often break down rubber or foam gaskets, leading to stickiness, swelling, or accelerated deterioration. Always consult your manufacturer’s manual for specific cleaning and care recommendations.
Where can I buy replacement vacuum sealer gaskets?
Replacement vacuum sealer gaskets are typically available directly from the vacuum sealer manufacturer’s website or through authorized dealers. You can also find compatible third-party gaskets on major online retailers like Amazon or specialized kitchen supply stores. Always ensure you purchase the correct gasket model number for your specific vacuum sealer to guarantee a proper fit.
What’s the difference between foam and rubber gaskets?
Foam gaskets are common in many domestic vacuum sealers; they provide a good seal but tend to be more susceptible to compression and degradation from liquids. Rubber gaskets, often found in more robust or commercial machines, are generally more durable, flexible, and resistant to wear and tear, offering a longer lifespan.
Can a dirty gasket really stop my vacuum sealer from working?
Absolutely. A dirty gasket is one of the most common reasons a vacuum sealer fails to work properly. Food debris, crumbs, or dried liquids can create microscopic pathways for air to leak, preventing the machine from achieving or holding a strong vacuum. Regular cleaning is essential for consistent performance.