The quest for extending food freshness is a perennial challenge in every kitchen, and vacuum sealing stands as a powerful ally in this endeavor. While dry goods are straightforward, tackling liquids with an external vacuum sealer often presents a unique hurdle. Many home cooks and small businesses shy away from vacuum sealing soups, sauces, or marinated meats due to concerns about liquid being drawn into the machine, compromising the seal, or even damaging the appliance. However, with the right techniques and a clear understanding of your equipment, you can effectively preserve your liquid culinary creations, locking in flavor and nutrients for significantly longer periods. This comprehensive guide will equip you with the knowledge and strategies to master vacuum sealing liquids, ensuring your food stays fresh and delicious, without the need for an expensive chamber sealer.
What is a Vacuum Sealer? Why Do You Need One?
A vacuum sealer is a kitchen appliance designed to remove air from a package before sealing it, creating an airtight environment that significantly extends the shelf life of food. This process works by drawing out oxygen, which is a primary catalyst for food spoilage, as it fuels the growth of bacteria, mold, and yeast. By eliminating oxygen, a vacuum sealer drastically slows down these degradation processes, preventing freezer burn, preserving nutrients, and maintaining the original flavor and texture of your food.
The benefits of utilizing a vacuum sealer extend far beyond simple preservation. It dramatically prolongs the shelf life of both fresh and cooked foods, often by three to five times compared to traditional storage methods. This not only reduces food waste but also saves money in the long run by allowing you to buy in bulk or preserve seasonal produce. Furthermore, vacuum-sealed foods are protected from freezer burn, which occurs when air comes into contact with frozen food, leading to dehydration and loss of quality. Beyond food, vacuum sealers can protect important documents, silver, and other valuables from moisture and corrosion, making them a versatile tool for various household needs.
Common Types of Vacuum Sealers
Understanding the different types of vacuum sealers available is crucial for choosing the right tool for your specific needs, especially when dealing with liquids. Each type offers distinct advantages and limitations regarding power, versatility, and the ability to handle various food textures. Knowing these differences will help you make an informed decision and employ the most effective techniques for your sealing tasks.
-
Handheld Vacuum Sealers: These are compact, battery-operated devices primarily designed for use with special zipper-top vacuum seal bags or containers.
- Advantages: Extremely portable, easy to store, and generally the most affordable option. They are convenient for quick, everyday use with specific items.
- Disadvantages: Offer the lowest suction power and are not suitable for heavy-duty or continuous use. They are generally not ideal for sealing large volumes of liquids directly in bags, though they work well with their designated liquid-friendly containers.
-
External (Edge) Vacuum Sealers: These are the most common type for home use, featuring an open sealing channel where the edge of a specialized textured bag is inserted. The machine then vacuums out the air and heat-seals the bag.
- Advantages: Good balance of power and affordability, making them versatile for a wide range of dry and semi-moist foods. Many models offer settings for moist food, which can be helpful for liquids when used with specific techniques.
- Disadvantages: The primary challenge with liquids is that the machine’s vacuum pump can draw liquid directly into the sealing area, preventing a proper seal or damaging the machine. Special techniques are almost always required for liquid sealing.
-
Chamber Vacuum Sealers: These are typically larger, more expensive units found in commercial settings, though smaller versions are available for serious home users. The entire bag, including its contents, is placed inside a chamber.
- Advantages: Can seal liquids effortlessly without special preparation, as the air pressure inside the chamber equalizes, preventing liquids from being drawn out. They offer superior power and consistency.
- Disadvantages: Significantly higher cost, larger footprint, and generally overkill for average home use. This article focuses on methods without using these specialized machines.
Comparing Vacuum Sealer Types
Choosing the right vacuum sealer hinges on a clear understanding of how different models stack up against key criteria, particularly their capabilities with liquids. This comparison highlights the practical differences, helping you identify which type aligns best with your kitchen habits and preservation goals.
| Feature | Handheld Sealer | External (Edge) Sealer | Chamber Sealer |
|---|---|---|---|
| Power/Suction | Low | Medium to High | Very High |
| Size | Very Compact | Medium to Large | Large to Very Large |
| Price Range | $20 – $70 | $50 – $300 | $400 – $3000+ |
| Noise Level | Low | Moderate to High | Low to Moderate (during vacuum cycle) |
| Liquid Sealing | Limited (best with special containers) | Difficult, requires specific techniques | Excellent, no special prep needed |
| Bag Type | Special zipper bags/containers | Textured (embossed) rolls/bags | Smooth (non-embossed) bags |
| Speed | Slow | Moderate | Fast |
| Ideal Use | Everyday snacks, small portions, containers | Bulk buying, meal prep, dry/semi-moist foods | Commercial use, sous vide, heavy liquid use |
Guide to Choosing the Right Vacuum Sealer
Selecting the ideal vacuum sealer requires thoughtful consideration of your specific needs, budget, and the types of food you intend to preserve. Making an informed decision ensures you invest in a machine that will serve you effectively and efficiently for years to come. Do not just focus on the lowest price, but rather the value and features that align with your lifestyle.
When purchasing a vacuum sealer, several factors warrant your attention. Firstly, consider your usage needs: how often will you use it, what types of food will you seal (especially liquids vs. dry), and what quantities? If you’re primarily sealing dry goods and occasional semi-moist items, a good external sealer is sufficient. Secondly, set a budget, as prices vary widely from basic handheld units to advanced commercial-grade machines. Thirdly, assess the size and design of the machine to ensure it fits comfortably in your kitchen space without being cumbersome.
Power and vacuum pressure are critical, especially if you plan to seal larger items or need a strong, consistent seal. Look for models with a powerful pump. Additional features can greatly enhance usability: a “moist” or “liquid” setting reduces suction to prevent liquid overflow; a pulse function gives you manual control over vacuuming; and an integrated bag cutter and roll storage improve convenience. Finally, brand reputation and reliability are paramount; research well-known brands and read user reviews to gauge durability and customer satisfaction. Always read the specifications carefully, compare different models, and purchase from reputable retailers that offer warranties and good customer service.
Top 3 Vacuum Sealers for Home Use (with Liquid Handling Capabilities)
For those looking to vacuum seal liquids without a chamber sealer, the focus should be on external models that offer robust performance and features that mitigate liquid-related challenges. While no external sealer can perfectly handle free-flowing liquids like a chamber sealer, certain models excel when paired with the right techniques. These machines often feature stronger pumps, adjustable vacuum settings, or “moist” food modes, making them more adaptable for semi-liquids or pre-frozen items.
Here are three highly-regarded external vacuum sealers that are excellent choices for home use, particularly when attempting to seal liquids using the methods outlined in the next section:
-
FoodSaver FM5200 2-in-1 Automatic Vacuum Sealing System:
- Pros: Features a “Express Bag Maker” that simplifies roll use and a “Moist/Dry” food setting. Its patented drip tray is removable and dishwasher-safe, offering a layer of protection against accidental liquid spills. It also boasts strong suction and consistent seals.
- Cons: Can be a bit bulky for smaller kitchens. The cost is at the higher end for external sealers.
- Specs: Automatic bag detection, pull-out handheld sealer for containers, drip tray.
- Price: Mid to high-range.
- Why it’s good for liquids: The moist setting and excellent drip tray are vital for managing liquids, and its strong suction ensures a good seal once liquids are managed.
-
Geryon Automatic Vacuum Sealer Machine:
- Pros: A popular budget-friendly option known for its ease of use and compact design. It offers both “Dry” and “Moist” food modes, and its powerful vacuum pump provides good sealing performance for its price point. It’s often recommended for beginners.
- Cons: May not be as durable as higher-end models with very heavy, continuous use. Sometimes the seal bar can get hot if used too frequently without a break.
- Specs: One-touch automatic vacuum and seal, separate seal function, compact design.
- Price: Budget-friendly.
- Why it’s good for liquids: The dedicated “Moist” mode is a significant advantage, allowing for a gentler vacuum process that helps prevent liquid from being pulled into the seal bar.
-
Anova Culinary Precision Vacuum Sealer Pro:
- Pros: Designed with sous vide enthusiasts in mind, this sealer offers robust construction, a powerful double-piston pump, and a pulse vacuum function for precise control. It has a heavy-duty seal and can handle continuous sealing without overheating. It also includes an internal roll storage and cutter.
- Cons: Higher price point, and its larger size might be a consideration.
- Specs: Double-piston pump, commercial-grade vacuum, roll storage and cutter, pulse vacuum, “wet” food mode.
- Price: Premium-range for external sealers.
- Why it’s good for liquids: The pulse function provides manual control, crucial for stopping the vacuum just before liquid reaches the seal. Its powerful pump can quickly evacuate air, and the robust build offers more confidence when dealing with potentially messy operations.
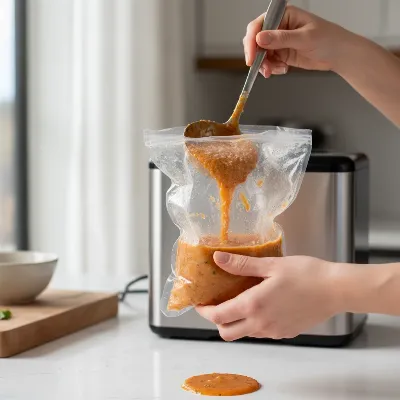 Person preparing liquid for vacuum sealing with an external sealer, showing techniques like freezing.
How to Vacuum Seal Liquids Without a Chamber Sealer
Vacuum sealing liquids with an external sealer requires a few clever tricks to prevent the liquid from being drawn into the machine and compromising the seal. While it might seem challenging initially, mastering these techniques will allow you to preserve everything from marinades to soups with confidence. The key is to manage the liquid’s flow and ensure a clean, dry sealing area.
1. The “Pre-Freeze” Method: This is arguably the most effective and widely recommended technique for vacuum sealing liquids.
- Instructions: Pour your liquid (soup, sauce, stew) into a vacuum sealer bag, leaving at least 3-4 inches of space from the top. Place the bag upright in your freezer, ensuring the liquid doesn’t spill, until it’s completely frozen solid. Once frozen, remove the bag and proceed with regular vacuum sealing. The frozen liquid acts like a solid block, preventing any suction of fluid into the machine.
- Why it works: Eliminates the risk of liquid being pulled into the sealing bar, guaranteeing a clean and strong seal.
2. The “Chill or Slush” Method: A variation of freezing, this method works well for semi-liquids or when you don’t have time for a full freeze.
- Instructions: Chill your liquid in the refrigerator until it’s very cold, or place it in the freezer just long enough for it to become slushy or partially frozen. The increased viscosity or ice crystals will slow down its movement during vacuuming.
- Why it works: The colder and thicker the liquid, the less likely it is to be drawn up by the vacuum. This buys you more time to get a good seal.
3. The “Paper Towel” or “Coffee Filter” Trick: This simple method helps absorb any rogue droplets that might try to reach the seal line.
- Instructions: After filling your bag with liquid (leaving ample head space), fold a small piece of paper towel or a coffee filter into a strip and place it horizontally inside the bag, just below the area where the seal will be made. The paper will catch any liquid that starts to get sucked up.
- Why it works: Acts as a barrier, absorbing small amounts of liquid before they can interfere with the heat seal.
4. The “Gravity Assisted” or “Overhang” Method: Using physics to your advantage.
- Instructions: Place the filled vacuum bag on the edge of your counter or table, with the liquid contents hanging downwards. Position the mouth of the bag into the vacuum sealer, ensuring the liquid remains below the sealing bar due to gravity. This technique is best combined with the “chill” method.
- Why it works: Gravity keeps the liquid at the bottom of the bag, away from the sealing area, allowing the machine to pull air more effectively from above the liquid.
5. The “Manual Pulse” or “Moist Setting” Technique: Leverage your machine’s features for control.
- Instructions: If your sealer has a “Moist” or “Wet” food setting, use it. This setting often reduces the vacuum pressure or cycles it differently to prevent liquid overflow. For machines with a manual “Pulse” function, engage it and visually monitor the liquid. As soon as the liquid starts to rise towards the seal bar, quickly hit the “Seal Only” button to stop the vacuum and engage the heat seal.
- Why it works: Gives you precise control over the vacuum process, allowing you to stop it just before liquid reaches the critical sealing zone.
6. Vacuum Sealing in Jars or Containers: Not technically “bags,” but a valid way to seal liquids with an external sealer.
- Instructions: Many external vacuum sealers come with an accessory hose and special attachments for vacuum-sealing mason jars or rigid containers designed for vacuum use. Simply pour your liquid into the appropriate jar/container, attach the hose to the lid/port, and let the machine evacuate the air.
- Why it works: The rigid container prevents liquid from flowing into the machine, making it a mess-free and reliable method for sauces, soups, and even delicate items.
Always remember to leave adequate headspace in your bags (at least 3-4 inches for liquids) to allow for the vacuum process and prevent spillage. With practice, these techniques will become second nature, enabling you to confidently preserve all your favorite liquid concoctions.
Using and Maintaining Your Vacuum Sealer
Proper usage and consistent maintenance are key to maximizing the lifespan and efficiency of your vacuum sealer, especially when handling liquids. Following best practices ensures reliable performance and keeps your machine in top condition, ready for your next batch of food preservation. A well-maintained machine is a high-performing machine.
To effectively use your vacuum sealer, start by preparing your food appropriately. For liquids, this means employing one of the techniques mentioned above, such as pre-freezing or chilling. Always ensure your food is cool before vacuum sealing, as hot food can create steam that interferes with the seal. Next, select the correct vacuum seal bag, ensuring it’s specifically designed for vacuum sealing and is appropriately sized for your contents, leaving plenty of headspace. When performing the vacuum sealing process, ensure the open end of the bag is clean and dry; any moisture, crumbs, or food residue on the sealing area can prevent a proper seal. Place the bag correctly into the vacuum channel, close the lid, and initiate the vacuum and seal cycle. Once sealed, store your vacuum-sealed food in the refrigerator, freezer, or pantry according to the food type.
For proper maintenance, cleaning your machine after each use is paramount, particularly if you’ve sealed anything moist or liquid. A removable drip tray (if available) should be emptied and washed. Wipe down the sealing bar and vacuum channel with a damp cloth to remove any food particles or moisture. Ensure these areas are completely dry before storing the machine. Store your vacuum sealer in a clean, dry place, away from extreme temperatures. Regularly inspect and replace accessories like foam gaskets or sealing strips if they show signs of wear or damage, as these are crucial for maintaining an airtight seal. Timely cleaning and inspection will prevent common issues and extend the life of your appliance.
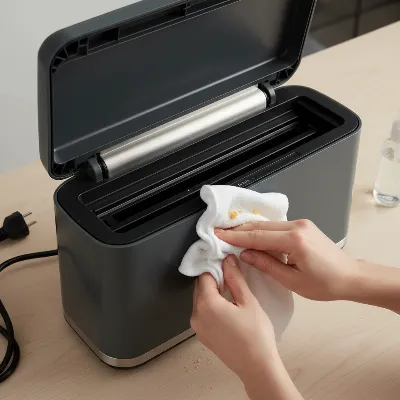 Hands cleaning an external vacuum sealer after use, emphasizing hygiene and proper care.
Common Problems and Solutions
Even with the best techniques, you might encounter issues when vacuum sealing, especially with liquids. Understanding common problems and knowing how to troubleshoot them can save you frustration and ensure your food is properly preserved. Most issues have simple solutions that can be easily implemented at home.
-
Machine Not Activating or Sealing:
- Problem: The machine doesn’t start, or the vacuum/seal function doesn’t engage.
- Solution: First, check if the machine is properly plugged into a functioning power outlet. Ensure the lid is securely latched or pressed down firmly on both sides, as many sealers have safety mechanisms that prevent operation if not closed correctly. Also, check if the bag is properly inserted and aligned in the vacuum channel.
-
Incomplete or Weak Seal:
- Problem: The bag doesn’t create a strong vacuum, or the seal line looks weak, allowing air to re-enter. This is particularly common with liquids if moisture interferes.
- Solution: Moisture is the biggest culprit here. Ensure the very end of the bag (where the seal is made) is absolutely dry and free of any liquid, crumbs, or grease. Use a paper towel trick if necessary, or pre-freeze liquids more thoroughly. Also, inspect the sealing strip and foam gaskets for any damage or debris; clean them or replace them if worn. Sometimes, simply running the seal cycle a second time can help. Ensure you’re using high-quality, compatible vacuum sealer bags.
-
Machine Making Loud Noise, But No Vacuum:
- Problem: The motor sounds like it’s working hard, but little to no air is being removed from the bag.
- Solution: This often indicates a leak in the system. Check the foam gaskets around the vacuum channel; they might be out of place, dirty, or cracked, preventing a proper vacuum seal. Clean them thoroughly or replace them. Ensure the bag itself doesn’t have any small holes or tears, which would allow air to continuously enter.
-
Vacuum Bag Tearing During Sealing:
- Problem: The bag tears near the seal line or during the vacuum process.
- Solution: This can happen if the bag is overfilled, creating too much tension, or if sharp edges of food (like bones) puncture the bag. For liquids, ensure you’ve left plenty of headspace, and consider using a double seal for added security. If using very hot food, ensure it’s cooled down completely, as steam can expand and weaken the bag. Always use bags designed for vacuum sealing, as thinner bags may not withstand the pressure.
“Many common vacuum sealing frustrations, especially with liquids, boil down to a single principle: a clean and dry sealing surface is non-negotiable for a perfect seal. Master that, and you’ll overcome most challenges.” – Chef Antoine Dubois, Culinary Preservation Expert
Conclusion
Mastering the art of vacuum sealing liquids without the aid of a specialized chamber sealer is an invaluable skill for any home cook or small business focused on efficient food preservation. By employing simple yet effective techniques such as pre-freezing, strategic chilling, using absorbent barriers, or leveraging your external sealer’s specific features, you can confidently preserve everything from delicate sauces to hearty stews. This not only extends the shelf life of your culinary creations but also safeguards their flavor, nutrients, and texture, preventing costly food waste.
Embrace these methods, maintain your equipment diligently, and soon you’ll find vacuum sealing liquids to be a seamless part of your kitchen routine. The journey to optimal food preservation is one of continuous learning and adaptation. What delicious liquid creations will you preserve next, now that you have the knowledge to do so effectively?
Frequently Asked Questions
Can I vacuum seal hot liquids with an external sealer?
|
Our Picks for the Best Vacuum Sealer in 2026
As an Amazon Associate I earn from qualifying purchases.
|
||
| Num | Product | Action |
|---|---|---|
| 1 | FoodSaver Vacuum Sealer Machine, Automatic Bag Detection, Sous Vide Friendly, with sealer bags, roll, handheld vacuum sealer, black |

|
| 2 | Mesliese Vacuum Sealer Machine Powerful 90Kpa Precision 6-in-1 Compact Food Preservation System with Cutter, 2 Bag Rolls & 5 Pre-cut Bags, Widened 12mm Sealing Strip, Dry&Moist Modes (Silver) |
|
| 3 | 95kPa Precision Vacuum Sealer Machine, Double Heat Seal for Dry/Moist Food, Easy-Lock Handle, Built-in Bag Storage & Cutter, Progress Display, Pulse Mode, Removable Drip Tray, Silver |
|
| 4 | Nesco Deluxe Food VS-12 Vacuum Sealer, 130 Watts, Kit Bags & Viewing Lid, Compact, Silver |
|
| 5 | Chef Preserve Compact Vacuum Sealer for Food (Vacuum Sealer Machine + 30 Reusable Vacuum Bags) Powerful Handheld Vacuum Sealer Machine, Seal Meal Saver, Portable Food Sealer |
|
| 6 | NutriChef Food Vacuum Sealer Machine - Automatic Air Sealing System for Dry & Moist Foods, LED Touch Controls, Includes Vacuum Bags, Hose & Wine Stopper, High Suction Power, 14"x6"x3", Silver |
|
| 7 | 90KPa Portable Vacuum Sealer Machine for Food, One-Touch Open Lid, Detachable & Easy to Clean, Vertical Placement Saves Space, Powerful Suction for Freezer Bags & Food Storage |
|
| 8 | FoodSaver PowerVac Compact Vacuum Sealing Machine Stainless Steel & Black Vertical Storage VS0150 | Preserves freshness reduces bag waste for both dry and wet food |
|
| 9 | Food Vacuum Sealer Machine, Powerful & Continuous Vacuum Sealing for Kitchen Storage & Meal Prep, Wet & Dry Food Sealing, Detachable Upper & Lower Design for Easy Cleaning, Includes 50 Bags |
|
| 10 | Anybear Vacuum Sealer Machine, 90kPa 120W Wide Seal All-IN-1 Powerful Food Storage, Build-in Cutter | Bags Storage | Digital Countdown Display | 2 Bag Rolls and 5pcs Pre-cut Bags (Gray) |
|
It is strongly recommended to cool liquids completely before vacuum sealing. Hot liquids can produce steam, which can prevent a proper seal and potentially damage your vacuum sealer. Always ensure liquids are at room temperature or colder before attempting to seal them.
What kind of bags should I use for vacuum sealing liquids?
You should use textured (embossed) vacuum sealer bags or rolls specifically designed for external vacuum sealers. These bags have channels that allow air to be drawn out effectively. For liquids, ensure they are durable and leave ample headspace (at least 3-4 inches) from the liquid level to the top of the bag.
How long do vacuum-sealed liquids last in the freezer?
When properly vacuum sealed and frozen, liquids like soups and sauces can last for 1 to 2 years or even longer in the freezer, significantly extending their shelf life compared to traditional storage methods. Always check for signs of spoilage before consumption.
Can I reuse vacuum sealer bags for liquids?
While some vacuum sealer bags can be washed and reused for dry goods, it’s generally not recommended for liquids, especially if the bag contained raw meat juices or strong odors. For food safety and best results, it’s safer to use a new bag each time you vacuum seal liquids.
Will vacuum sealing liquids prevent freezer burn?
Yes, vacuum sealing effectively removes the oxygen that causes freezer burn, providing an airtight barrier that protects liquids from dehydration and ice crystal formation. This helps maintain the quality, flavor, and texture of your frozen soups, sauces, and stocks.