Few things are as frustrating as pulling out your vacuum sealer, ready to preserve a fresh batch of food, only to find it’s lost its suction power. That satisfying hiss and tight seal are replaced with a limp, air-filled bag, jeopardizing your efforts to extend shelf life and reduce waste. A malfunctioning vacuum sealer can turn food preservation into a perplexing chore, but more often than not, the issue isn’t a dead appliance but a simple problem with an easy solution. Understanding the common culprits behind poor suction can quickly get your trusty kitchen gadget back to peak performance, ensuring your ingredients stay fresh, flavorful, and free from freezer burn.
What is a Vacuum Sealer and Why Do You Need One?
At its core, a vacuum sealer removes air from a bag or container and then seals it, creating an airtight environment. This process drastically slows down oxidation and the growth of bacteria, molds, and yeast that cause food spoilage. By eliminating oxygen, vacuum sealing extends the freshness of food significantly longer than traditional storage methods like zippered bags or containers. This means less food waste, more efficient meal prep, and the ability to buy in bulk without worry. Beyond food, vacuum sealers are invaluable for protecting important documents, preserving silver from tarnishing, or keeping camping gear dry. They are a game-changer for anyone serious about maximizing their food’s lifespan and maintaining organization.
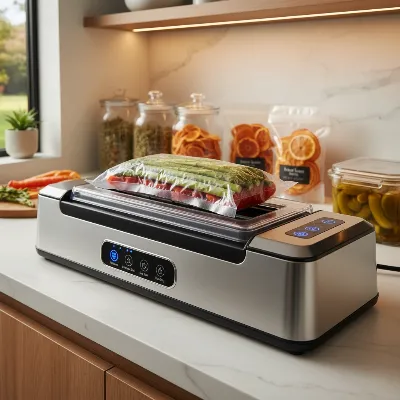 Vacuum sealer machine preserving various foods, extending freshness and reducing waste
Common Types of Vacuum Sealers
Vacuum sealers come in various forms, each designed to meet different needs and volumes of use.
- Handheld Vacuum Sealers: These compact, battery-operated devices are ideal for quick, everyday sealing of smaller bags, zipper-top bags, or vacuum-sealable containers. They are incredibly convenient and affordable, perfect for portion control or storing leftovers, but generally offer less powerful suction and are not designed for large-scale tasks.
- External/Countertop Vacuum Sealers (Household Models): This is the most common type for home use. Food is placed into a textured bag, and the open end is inserted into the machine, which then pulls the air out and heat-seals the bag shut. They offer significantly more power and versatility than handheld models, capable of sealing a variety of foods, from meats to liquids (with precautions). Their size and power make them suitable for regular family use, bulk food storage, and sous vide cooking prep.
- Chamber Vacuum Sealers (Commercial/Industrial): Often found in professional kitchens or for serious home preservers, these machines are a step up in both capability and price. The entire bag, food and all, is placed inside a chamber. The air is removed from the entire chamber, then the bag is sealed. This method is superior for liquids, delicate foods, and achieving a complete vacuum. They are larger, heavier, and a significant investment, making them less common for average household use.
Troubleshooting Your Vacuum Sealer: 5 Quick Fixes for No Suction
When your vacuum sealer fails to draw air, it can often be remedied with a few straightforward checks. Here are five common reasons for a lack of suction and how to fix them.
1. Inspect the Bag
The bag itself is frequently the source of suction problems. It’s the first line of defense in creating a vacuum, and any compromise can prevent a proper seal.
- Compatibility: Ensure you are using bags specifically designed for vacuum sealers. Smooth or regular plastic bags will not work as they don’t allow air to be extracted. Always use high-quality, textured vacuum bags.
- Damage: Carefully inspect the bag for any hidden pinholes, tears, or small punctures. Even a tiny imperfection can allow air to leak back in, preventing a vacuum from forming. Discard any damaged bags and opt for a new one.
- Placement: The bag’s open end must be positioned correctly within the vacuum channel. If it’s too far in, too far out, or wrinkled, the machine won’t be able to establish a complete seal. Lay the bag flat, smooth out any creases, and ensure the open edge rests entirely inside the vacuum channel, aligned with the sealing strip.
- Moisture or Debris: Food particles, crumbs, or moisture on the sealing edge of the bag can create a barrier, preventing a tight seal. Wipe the inside and outside of the bag’s opening with a clean, dry cloth or paper towel to remove any contaminants. For very moist foods, consider pre-freezing or placing a folded paper towel at the top of the bag to absorb excess liquid before sealing.
|
Our Picks for the Best Vacuum Sealer in 2026
As an Amazon Associate I earn from qualifying purchases.
|
||
| Num | Product | Action |
|---|---|---|
| 1 | Chef Preserve Compact Vacuum Sealer for Food (Vacuum Sealer Machine + 30 Reusable Vacuum Bags) Powerful Handheld Vacuum Sealer Machine, Seal Meal Saver, Portable Food Sealer |

|
| 2 | Mesliese Vacuum Sealer Machine Powerful 90Kpa Precision 6-in-1 Compact Food Preservation System with Cutter, 2 Bag Rolls & 5 Pre-cut Bags, Widened 12mm Sealing Strip, Dry&Moist Modes (Silver) |
|
| 3 | NutriChef Food Vacuum Sealer Machine - Automatic Air Sealing System for Dry & Moist Foods, LED Touch Controls, Includes Vacuum Bags, Hose & Wine Stopper, High Suction Power, 14"x6"x3", Silver |
|
| 4 | 95kPa Precision Vacuum Sealer Machine, Double Heat Seal for Dry/Moist Food, Easy-Lock Handle, Built-in Bag Storage & Cutter, Progress Display, Pulse Mode, Removable Drip Tray, Silver |
|
| 5 | 90KPa Portable Vacuum Sealer Machine for Food, One-Touch Open Lid, Detachable & Easy to Clean, Vertical Placement Saves Space, Powerful Suction for Freezer Bags & Food Storage |
|
| 6 | FoodSaver Vacuum Sealer Machine, Automatic Bag Detection, Sous Vide Friendly, with sealer bags, roll, handheld vacuum sealer, black |
|
| 7 | Anybear Vacuum Sealer Machine, 90kPa 120W Wide Seal All-IN-1 Powerful Food Storage, Build-in Cutter | Bags Storage | Digital Countdown Display | 2 Bag Rolls and 5pcs Pre-cut Bags (Gray) |
|
| 8 | Food Vacuum Sealer Machine, Powerful & Continuous Vacuum Sealing for Kitchen Storage & Meal Prep, Wet & Dry Food Sealing, Detachable Upper & Lower Design for Easy Cleaning, Includes 50 Bags |
|
| 9 | FoodSaver PowerVac Compact Vacuum Sealing Machine Stainless Steel & Black Vertical Storage VS0150 | Preserves freshness reduces bag waste for both dry and wet food |
|
| 10 | Nesco Deluxe Food VS-12 Vacuum Sealer, 130 Watts, Kit Bags & Viewing Lid, Compact, Silver |
|
2. Check the Sealing Gasket or Strip
The gasket, typically a rubber or foam seal around the vacuum chamber or lid, and the sealing strip are critical for creating an airtight environment.
- Cleanliness: Over time, food residue, dust, or moisture can accumulate on the gasket or sealing strip, interfering with its ability to form a proper seal. Gently clean both the upper and lower gaskets and the heat sealing strip with a damp cloth, ensuring no abrasive cleaners are used that could cause damage.
- Damage or Wear: Gaskets can become cracked, torn, or flattened with prolonged use, leading to air leaks. Inspect the gasket carefully for any signs of wear. If it appears damaged or no longer pliable, it likely needs replacement. Many manufacturers offer replacement parts, which are often inexpensive and easy to install. Some models also allow you to flip the lower gasket over to get more life out of it.
- Proper Seating: Ensure the gasket is correctly seated in its track. If it’s misaligned or partially dislodged, it won’t be able to create the necessary vacuum.
3. Clear the Vacuum Channel or Port
The vacuum channel or port is the pathway through which air is extracted. If this area is obstructed, suction will be compromised or non-existent.
- Blockages: Food debris, small crumbs, or even liquids that have been pulled into the channel can clog the airflow. Unplug your sealer and use a small brush, cotton swab, or even compressed air to carefully clear any obstructions from the vacuum channel and port. Be gentle to avoid damaging internal components.
- Drip Tray: Many vacuum sealers have a removable drip tray designed to catch excess liquids. Ensure this tray is clean and properly reinserted, as a full or improperly placed tray can sometimes affect suction.
4. Ensure Proper Lid Latch & Power
Sometimes, the simplest solutions are the most overlooked. The physical connection and power supply are fundamental to your sealer’s operation.
- Lid Latching: The lid of your vacuum sealer must be fully closed and securely latched for the vacuum function to engage properly. Most models have a locking mechanism or require a firm press until you hear a “click.” If the lid isn’t completely sealed, air will escape, and the machine won’t be able to pull a vacuum.
- Power Supply: Confirm that the vacuum sealer is plugged securely into a functioning electrical outlet. Check the power cord for any damage or fraying. If your model is battery-powered, ensure the batteries are charged or replaced. A weak power supply can result in insufficient suction.
- Overheating: Continuous use can cause some vacuum sealers to overheat, which may trigger a safety shutdown or reduce performance. If your sealer stops mid-cycle or performs poorly after several consecutive uses, unplug it and allow it to cool down for 10-15 minutes before attempting to use it again. Follow manufacturer guidelines for recommended cool-down times between cycles.
5. Evaluate the Vacuum Pump
If you’ve checked all the external components and the problem persists, the issue might lie with the internal vacuum pump.
- Pump Functionality: When you initiate the vacuum cycle, you should hear the pump working. If it’s silent, makes unusual noises, or sounds significantly weaker than usual, the pump may be struggling.
- Internal Blockages: Less common but possible, internal hoses or intake ports connected to the pump can become clogged, restricting airflow. This usually requires disassembling the unit, which is best left to experienced individuals or professionals.
- Pump Failure: A vacuum pump can wear out over time, especially with heavy use. If the motor runs but there’s no suction, or if the suction is consistently very weak despite all other troubleshooting, the pump might be faulty. In such cases, consulting the user manual for specific pump troubleshooting or contacting customer support is advisable. For older or budget models, replacing the unit might be more cost-effective than a pump repair.
Maintaining Your Vacuum Sealer for Longevity
Regular maintenance is key to preventing suction issues and extending the life of your vacuum sealer.
- Regular Cleaning: After each use, wipe down the sealing strip, gaskets, and vacuum channel to remove any food particles or moisture. A soft, damp cloth is usually sufficient.
- Proper Storage: Store your vacuum sealer in a clean, dry place, away from extreme temperatures or direct sunlight. Ensure the lid is not fully latched during storage to prevent compression and premature wear of the gaskets.
- Use Quality Bags: Invest in high-quality, compatible vacuum sealer bags. Cheap or incorrect bags can lead to sealing failures and unnecessary frustration.
- Allow Cooldown: Always give your machine a brief break between sealing cycles, especially during long sessions, to prevent overheating and strain on the motor.
> “A little proactive care goes a long way. Most vacuum sealer issues stem from simple maintenance neglect rather than a catastrophic failure.” – Sarah Miller, Appliance Repair Specialist
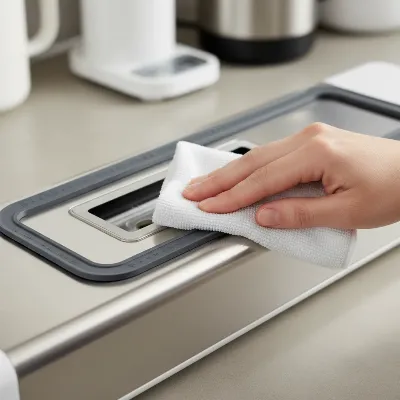 Person cleaning a vacuum sealer gasket for maintenance
When to Consider a Replacement or Professional Repair
While many issues are easily fixable, there comes a point when a replacement or professional repair is the more sensible option. If you’ve tried all troubleshooting steps and your vacuum sealer still isn’t performing, consider:
- Recurring Problems: If the same issues keep appearing, or if new problems arise frequently, the unit might be nearing the end of its lifespan.
- Age of the Unit: Older vacuum sealers are more prone to worn-out components, especially the vacuum pump, which can be expensive to replace.
- Cost-Effectiveness: Compare the cost of replacement parts or professional repair to the cost of a new machine. Often, for budget or older models, purchasing a new, more efficient sealer is the better long-term investment.
Conclusion
A well-functioning vacuum sealer is an indispensable tool in any kitchen, helping to extend food freshness and simplify meal preparation. Encountering a lack of suction can be disheartening, but by systematically checking the bag, inspecting the gaskets and sealing strip, clearing the vacuum channel, ensuring proper lid latching and power, and evaluating the vacuum pump, you can resolve most common issues quickly. Regular cleaning and mindful operation will not only prevent these problems but also ensure your appliance continues to serve your food preservation needs for years to come. What’s your top tip for keeping your vacuum sealer in perfect working order?
Frequently Asked Questions
Can I use regular zipper bags in my vacuum sealer?
No, you cannot use regular zipper bags in most vacuum sealers designed for food preservation. Standard zipper bags are typically smooth and thin, lacking the textured channels necessary for the machine to draw air out effectively. They also don’t create an airtight heat seal like specialized vacuum sealer bags, which are thicker and designed to withstand the vacuuming process.
How often should I clean my vacuum sealer’s gasket?
It is recommended to clean your vacuum sealer’s gasket after every few uses, or immediately if you notice any food debris or moisture on it. Regular cleaning helps prevent buildup that can compromise the seal, ensuring consistent and effective vacuuming. For machines used frequently, a quick wipe-down after each sealing session is a good practice.