Many common vacuum sealer problems, such as failing to seal, losing suction, or not powering on, have straightforward DIY solutions that can get your appliance back in top working order. Before considering a replacement, users can often resolve issues by checking power connections, cleaning gaskets and sealing strips, ensuring proper bag placement, and allowing the machine to cool between uses. A systematic approach to troubleshooting can quickly pinpoint and resolve most malfunctions, extending the life of this invaluable kitchen tool.
What is a Vacuum Sealer? Why Do You Need One?
A vacuum sealer works by removing air from a specially designed bag or container before sealing it shut. This process creates an airtight environment that inhibits the growth of bacteria and mold, significantly slowing down spoilage. By eliminating oxygen, vacuum sealing locks in flavor, nutrients, and moisture, preserving the quality of your food for weeks or even months longer than traditional storage methods. Beyond food, these versatile machines can protect important documents, silver from tarnishing, or even keep camping gear dry. Keeping your vacuum sealer in prime condition ensures you reap these benefits consistently, making it a cornerstone of an efficient and waste-reducing kitchen.
Understanding Common Vacuum Sealer Types
Vacuum sealers primarily come in two types: external (or suction) sealers and chamber vacuum sealers. External sealers are the most common for home use, drawing air directly out of a textured bag placed outside the machine’s main body. They are generally more compact and affordable, ideal for dry or slightly moist foods. Chamber vacuum sealers, often found in commercial settings, place the entire bag inside a chamber and remove air from the entire space. This design makes them excellent for liquids and delicate items, but they are larger and more expensive. While their mechanisms differ, many troubleshooting steps, particularly those related to sealing strips, gaskets, and bag placement, apply to both types of machines.
Step-by-Step Troubleshooting for Common Vacuum Sealer Problems
When your vacuum sealer misbehaves, a systematic approach to troubleshooting can help pinpoint and resolve the issue quickly. Often, the solution is simpler than you might expect, involving basic cleaning or adjustment rather than complex repairs. Dive into these common problems and their DIY fixes to restore your sealer’s functionality.
No Power or Unit Not Turning On
A vacuum sealer that refuses to power on is an immediate showstopper. Before assuming the worst, check these fundamental components.
First, ensure the machine is securely plugged into a functioning electrical outlet. Test the outlet with another appliance to rule out a circuit issue. Inspect the power cord for any visible damage, frayed wires, or kinks that could interrupt the electrical flow. Sometimes, a safety feature prevents the unit from turning on if the lid isn’t fully closed and latched. Make sure the lid is pressed down firmly until it clicks into place. If your model has an internal fuse, consult the user manual on how to check and potentially replace it, though this is less common for DIYers.
Weak Suction or Not Vacuuming Properly
|
Our Picks for the Best Vacuum Sealer in 2026
As an Amazon Associate I earn from qualifying purchases.
|
||
| Num | Product | Action |
|---|---|---|
| 1 | NutriChef Food Vacuum Sealer Machine - Automatic Air Sealing System for Dry & Moist Foods, LED Touch Controls, Includes Vacuum Bags, Hose & Wine Stopper, High Suction Power, 14"x6"x3", Silver |

|
| 2 | Chef Preserve Compact Vacuum Sealer for Food (Vacuum Sealer Machine + 30 Reusable Vacuum Bags) Powerful Handheld Vacuum Sealer Machine, Seal Meal Saver, Portable Food Sealer |
|
| 3 | 95kPa Precision Vacuum Sealer Machine, Double Heat Seal for Dry/Moist Food, Easy-Lock Handle, Built-in Bag Storage & Cutter, Progress Display, Pulse Mode, Removable Drip Tray, Silver |
|
| 4 | 90KPa Portable Vacuum Sealer Machine for Food, One-Touch Open Lid, Detachable & Easy to Clean, Vertical Placement Saves Space, Powerful Suction for Freezer Bags & Food Storage |
|
| 5 | Anybear Vacuum Sealer Machine, 90kPa 120W Wide Seal All-IN-1 Powerful Food Storage, Build-in Cutter | Bags Storage | Digital Countdown Display | 2 Bag Rolls and 5pcs Pre-cut Bags (Gray) |
|
| 6 | Food Vacuum Sealer Machine, Powerful & Continuous Vacuum Sealing for Kitchen Storage & Meal Prep, Wet & Dry Food Sealing, Detachable Upper & Lower Design for Easy Cleaning, Includes 50 Bags |
|
| 7 | FoodSaver PowerVac Compact Vacuum Sealing Machine Stainless Steel & Black Vertical Storage VS0150 | Preserves freshness reduces bag waste for both dry and wet food |
|
| 8 | FoodSaver Vacuum Sealer Machine, Automatic Bag Detection, Sous Vide Friendly, with sealer bags, roll, handheld vacuum sealer, black |
|
| 9 | Nesco Deluxe Food VS-12 Vacuum Sealer, 130 Watts, Kit Bags & Viewing Lid, Compact, Silver |
|
| 10 | Mesliese Vacuum Sealer Machine Powerful 90Kpa Precision 6-in-1 Compact Food Preservation System with Cutter, 2 Bag Rolls & 5 Pre-cut Bags, Widened 12mm Sealing Strip, Dry&Moist Modes (Silver) |
|
Perhaps the most common frustration, a vacuum sealer that isn’t pulling air effectively defeats its primary purpose. Several factors can contribute to poor suction.
- Improper Bag Placement: The bag’s open end must be completely and smoothly inside the vacuum channel, lying flat without wrinkles or creases. If it’s misaligned or extends too far, the machine can’t create an effective seal or vacuum.
- Dirty or Worn Gaskets: The rubber gaskets (usually around the lid and inside the vacuum channel) are crucial for creating an airtight seal. Inspect them for food debris, cracks, hardening, or flattening. Clean them with a damp cloth; if they are damaged, replacement gaskets are often inexpensive and easy to install.
- Blocked Vacuum Channel or Port: Food particles, grease, or crumbs can accumulate in the vacuum channel or air intake port, obstructing airflow. Unplug the unit and carefully clean these areas with a soft brush, cotton swab, or damp cloth.
- Overfilled Bags: Leaving at least 2-3 inches of space at the top of the bag is essential. Overfilling can prevent a proper seal and obstruct the vacuum process.
- Pump Issues: If the motor runs but there’s still no suction after checking everything else, the vacuum pump itself might be failing. This often requires professional repair or replacement.
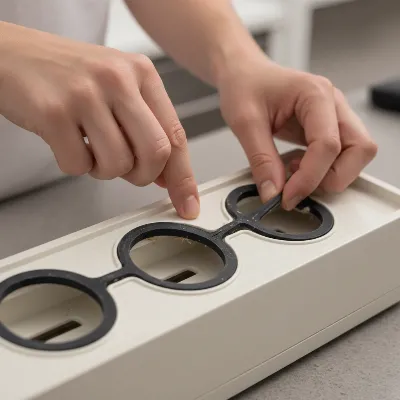 Person inspecting vacuum sealer gaskets for damage or debris
Bags Not Sealing or Poor Seal
Even if your machine vacuums perfectly, a faulty seal means air will quickly re-enter the bag, negating your preservation efforts.
- Dirty Sealing Strip/Bar: The heating element (sealing strip or bar) must be clean and free of food debris, moisture, or grease. Even tiny particles can prevent a complete seal. Wipe it with a damp cloth after each use.
- Bag Wrinkles or Creases: Any fold or wrinkle in the bag along the sealing area will create an air leak. Gently stretch the bag flat as you position it.
- Bag Quality and Compatibility: Not all bags are created equal. Ensure you are using high-quality bags compatible with your specific sealer model. Off-brand or thin bags may not seal effectively.
- Worn Teflon Tape: The sealing bar is often covered with a strip of Teflon tape, which prevents the bag from sticking and ensures even heat distribution. If this tape is burnt, torn, or discolored, it needs to be replaced.
- Incorrect Seal Time: Some sealers allow you to adjust the seal time. If the time is too short, the seal won’t form completely; if too long, the bag might melt. Experiment with settings, especially for thicker bags.
- Moisture or Grease on Bag Edge: Liquids or oils from food can interfere with the sealing process. Ensure the inside of the bag’s sealing area is dry and clean. For moist foods, pre-freeze them slightly or use the “moist” setting if available.
Bags Tearing or Melting
If your bags are consistently tearing or melting during the sealing process, it’s usually an issue with heat or sharp objects.
- Overheating: Continuous use without allowing the machine to cool down can cause the sealing bar to overheat, melting the bag rather than sealing it. Allow 20-30 seconds between seals, especially during heavy use.
- Sharp Contents: Items with sharp edges, like bones or dried pasta, can puncture the bag. Wrap these items in a paper towel or parchment paper before sealing to create a protective layer.
- Incorrect Seal Time: As mentioned, too long a seal time can cause the bag to melt through. Adjust your machine’s settings to a shorter duration if this is a recurring problem.
- Bag Type: Ensure the bags you are using are designed for vacuum sealing and can withstand the heat of the sealing strip.
Liquid Being Sucked into the Machine
When sealing moist foods, liquid can sometimes be drawn into the vacuum channel, leading to poor seals and potential damage to the machine’s pump.
- Overfilling: Leave ample space at the top of the bag, allowing liquid to remain below the vacuum channel.
- Pre-Freezing Moist Foods: For very wet items like soups, sauces, or marinated meats, pre-freeze them until they are solid or slushy before vacuum sealing. This prevents liquids from being pulled into the machine.
- Using “Moist” or “Gentle” Settings: Many modern vacuum sealers offer specific settings for moist foods or a pulse function, which allows you to manually control the vacuum process to prevent liquid from reaching the sealing area.
- Liquid Block Bags: Some specialized bags feature an absorbent strip that traps excess liquid, protecting the seal.
- Immediate Cleaning: If liquid does get sucked into the machine, immediately unplug it, wipe out all liquid from the vacuum channel and drip tray, and allow it to dry completely for at least 24 hours before reuse to prevent mold and electrical damage.
Essential Maintenance for Your Vacuum Sealer
Regular maintenance is the most effective way to prevent common issues and extend the lifespan of your vacuum sealer. A few minutes of care after each use can save you hours of troubleshooting.
- Daily Cleaning: After every use, unplug the machine and wipe down the exterior, sealing bar, and vacuum channel with a soft, damp cloth. Remove any food debris, grease, or moisture. If your model has a removable drip tray, wash it with warm, soapy water and dry it thoroughly.
- Gasket Care: Regularly inspect the gaskets for any signs of wear, cracks, or embedded food particles. Keep them clean and ensure they are properly seated. Some manufacturers recommend applying a food-safe lubricant to prolong their flexibility. If gaskets show significant damage, replace them promptly.
- Teflon Tape Inspection: Check the Teflon tape covering the sealing bar. If it appears burnt, frayed, or has holes, carefully peel it off and replace it with a new strip compatible with your model.
- Proper Storage: Store your vacuum sealer in a clean, dry place. Many manufacturers recommend storing the unit with the lid unlatched or slightly ajar to prevent the gaskets from compressing over time, which can lead to premature wear.
- Accessory Cleaning: If you use hose attachments or jar sealers, clean them with warm, soapy water after each use and dry them completely before storage.
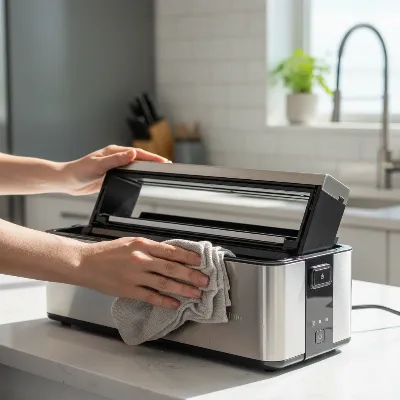 Person cleaning and maintaining a countertop vacuum sealer after use
When to Call a Professional or Consider Replacement
While many vacuum sealer issues are easily fixed with DIY methods, some problems warrant professional attention or indicate it might be time for a new unit. If you’ve tried all the troubleshooting steps for weak suction or no power, and suspect the vacuum pump motor is failing, or if the heating element has completely burned out, these are often beyond basic home repair. Persistent air leaks after replacing gaskets and Teflon tape, or if the unit consistently overheats without excessive use, could also point to internal electrical or mechanical faults. A professional technician might be able to diagnose and repair more complex issues, but sometimes, the cost of repair can approach the price of a new, more efficient model.
Conclusion
A malfunctioning vacuum sealer doesn’t have to mean the end of your food preservation efforts. By understanding common issues and applying simple DIY troubleshooting techniques, you can often restore your machine to perfect working order, extending its life and maximizing its utility. Regular cleaning, proper bag placement, and routine inspection of key components like gaskets and sealing strips are your best defense against most problems. Empower yourself with these fixes, and you’ll continue to enjoy the benefits of fresh, perfectly preserved food for years to come. What’s your biggest vacuum sealing challenge, and how has troubleshooting helped you overcome it?
Get our weekly buyer guide
Practical specs, not advice. Unsubscribe anytime.

My FoodSaver was losing suction, and I thought it was a goner. The tip about checking and cleaning the gaskets was a game-changer. It took a little bit of effort, but now it’s pulling a strong vacuum again. Definitely worth trying these DIY solutions before giving up on your machine.
This was incredibly helpful! My vacuum sealer kept overheating and wouldn’t seal after a few bags. I didn’t realize I needed to let it cool between uses. Now I just give it a minute or two, and it works perfectly every time. Such a simple fix that I completely overlooked.
I tried all the suggestions for my sealer not powering on, but nothing worked. I checked the power connection and even tried a different outlet, but still no luck. It’s a bit disappointing that these common fixes didn’t help my specific problem, so I guess I’ll have to look into a replacement after all.
I was so frustrated when my vacuum sealer stopped sealing properly. I almost bought a new one, but then I found this advice. Cleaning the sealing strip and making sure the bag was placed just right totally fixed it! It’s working like new again, and I saved a ton of money.