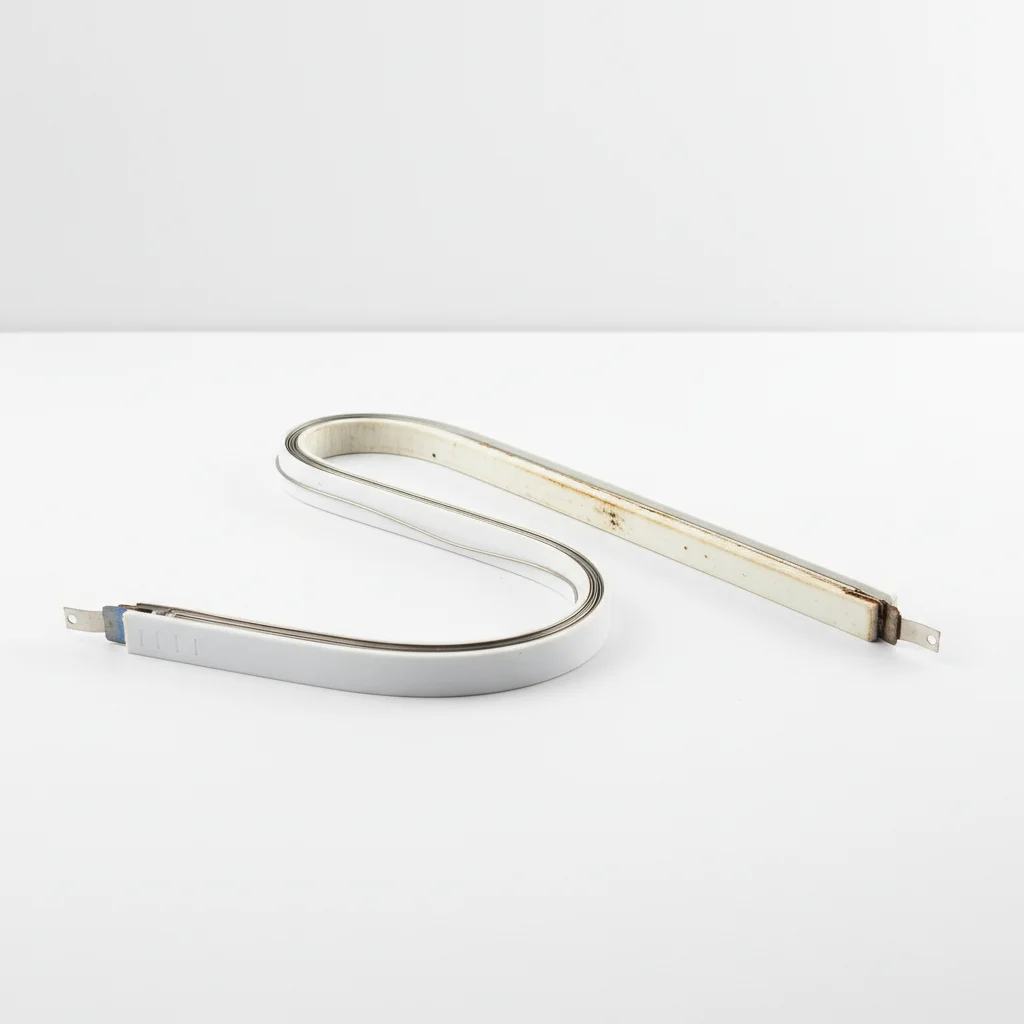
You should replace your vacuum sealer’s heat strip every 1 to 2 years with moderate home use, or more frequently if you observe inconsistent seals, burning odors, or visible damage. This proactive maintenance ensures optimal sealing performance and extends the shelf life of your preserved foods, preventing spoilage due to air leaks.
Understanding the Heat Strip’s Role
The heat strip, typically a thin wire or ribbon, is essential for generating the heat needed to melt and fuse the layers of your vacuum sealer bags. It operates with the pressure bar to create a strong, permanent seal. Over time, continuous heating and cooling cycles, along with potential residue buildup from sealing, can diminish the strip’s effectiveness. A worn heat strip may fail to reach the optimal temperature, leading to weak or incomplete seals that compromise food freshness. For more home food guides on this site.
Signs It’s Time for a Replacement
Several indicators suggest your heat strip might be failing. The most obvious sign is a failure to seal bags properly, resulting in air leaks or bags that come open easily. You might also observe uneven or discolored seals on your bags, indicating inconsistent heat distribution. A burning smell during the sealing process, even without visible smoke, can also point to an overheating or damaged heat strip. Visually inspecting the strip for fraying, discoloration, or breaks is also a good practice.
Factors Affecting Heat Strip Lifespan
|
Our Picks for the Best Vacuum Sealer in 2026
As an Amazon Associate I earn from qualifying purchases.
|
||
| Num | Product | Action |
|---|---|---|
| 1 | NutriChef Food Vacuum Sealer Machine - Automatic Air Sealing System for Dry & Moist Foods, LED Touch Controls, Includes Vacuum Bags, Hose & Wine Stopper, High Suction Power, 14"x6"x3", Silver |

|
| 2 | Nesco Deluxe Food VS-12 Vacuum Sealer, 130 Watts, Kit Bags & Viewing Lid, Compact, Silver |
|
| 3 | Food Vacuum Sealer Machine, Powerful & Continuous Vacuum Sealing for Kitchen Storage & Meal Prep, Wet & Dry Food Sealing, Detachable Upper & Lower Design for Easy Cleaning, Includes 50 Bags |
|
| 4 | Chef Preserve Compact Vacuum Sealer for Food (Vacuum Sealer Machine + 30 Reusable Vacuum Bags) Powerful Handheld Vacuum Sealer Machine, Seal Meal Saver, Portable Food Sealer |
|
| 5 | 90KPa Portable Vacuum Sealer Machine for Food, One-Touch Open Lid, Detachable & Easy to Clean, Vertical Placement Saves Space, Powerful Suction for Freezer Bags & Food Storage |
|
| 6 | Anybear Vacuum Sealer Machine, 90kPa 120W Wide Seal All-IN-1 Powerful Food Storage, Build-in Cutter | Bags Storage | Digital Countdown Display | 2 Bag Rolls and 5pcs Pre-cut Bags (Gray) |
|
| 7 | FoodSaver Vacuum Sealer Machine, Automatic Bag Detection, Sous Vide Friendly, with sealer bags, roll, handheld vacuum sealer, black |
|
| 8 | 95kPa Precision Vacuum Sealer Machine, Double Heat Seal for Dry/Moist Food, Easy-Lock Handle, Built-in Bag Storage & Cutter, Progress Display, Pulse Mode, Removable Drip Tray, Silver |
|
| 9 | FoodSaver PowerVac Compact Vacuum Sealing Machine Stainless Steel & Black Vertical Storage VS0150 | Preserves freshness reduces bag waste for both dry and wet food |
|
| 10 | Mesliese Vacuum Sealer Machine Powerful 90Kpa Precision 6-in-1 Compact Food Preservation System with Cutter, 2 Bag Rolls & 5 Pre-cut Bags, Widened 12mm Sealing Strip, Dry&Moist Modes (Silver) |
|
The longevity of your vacuum sealer’s heat strip is influenced by several factors. Frequent use, especially for long sealing sessions, will naturally shorten its life. Sealing bags with moisture or food particles on the sealing area can also cause premature wear and tear, as these residues can stick to and damage the strip. The quality of the heat strip itself, which can vary between different vacuum sealer models, also plays a role. Always refer to your sealer’s manual for specific maintenance recommendations.
- Inconsistent or incomplete bag seals.
- Visible damage like fraying, breaks, or severe discoloration on the strip.
- A persistent burning smell during the sealing cycle.
- Bags that frequently lose their vacuum after sealing.
- Your vacuum sealer is more than two years old with regular use.
DIY Heat Strip Replacement Steps
Replacing a heat strip is a relatively straightforward process for most home vacuum sealers. First, always unplug your device for safety. Carefully remove the old heat strip, often by gently prying it out of its clips or channels. Clean the area thoroughly to remove any residue. Then, install the new heat strip, ensuring it is taut and properly seated in its designated position. Make sure to use a replacement strip specifically designed for your vacuum sealer model to ensure compatibility and proper function.
Maintaining Your New Heat Strip
To maximize the life of your new heat strip, adopt good sealing practices. Always ensure the sealing area of your bags is clean and dry before sealing. Avoid overfilling bags, which can lead to food particles interfering with the seal. Regularly clean the sealing bar and surrounding area with a damp cloth to prevent buildup. Storing your vacuum sealer in a clean, dry environment also helps protect its components.
Frequently Asked Questions
How often should a vacuum sealer heat strip be replaced?
A vacuum sealer heat strip should generally be replaced every 1 to 2 years with moderate home use. However, if you notice issues like inconsistent seals or a burning smell, it may need replacement sooner.
What are the common signs of a failing heat strip?
Common signs of a failing heat strip include improper bag seals, air leaks, uneven or discolored seals, and a burning smell during the sealing process. Visible damage like fraying or breaks also indicates a need for replacement.
What factors can shorten the lifespan of a heat strip?
Factors that can shorten a heat strip's lifespan include frequent use, sealing bags with moisture or food particles on the sealing area, and the overall quality of the strip itself. Residue buildup can also degrade its effectiveness over time.
Is it difficult to replace a vacuum sealer heat strip at home?
Replacing a vacuum sealer heat strip is a relatively straightforward process for most home models. It involves unplugging the device, carefully removing the old strip, cleaning the area, and installing a new, compatible strip.
How can I extend the life of my new vacuum sealer heat strip?
To extend the life of your new heat strip, always ensure the sealing area of bags is clean and dry, avoid overfilling bags, and regularly clean the sealing bar. Storing your vacuum sealer in a clean, dry environment also helps.
Replace a Vacuum Sealer Heat Strip
Follow these steps to safely and effectively replace the heat strip in your home vacuum sealer, ensuring optimal sealing performance.
Always unplug your vacuum sealer from the power outlet to ensure safety before beginning any maintenance. Gather your new replacement heat strip and any small tools you might need, such as tweezers or a small screwdriver.
Carefully locate the old heat strip, which is often held in place by clips or channels. Gently pry it out, taking care not to damage the surrounding components. Dispose of the old strip properly.
Thoroughly clean the area where the heat strip sits to remove any accumulated food particles, moisture, or residue. A damp cloth followed by a dry one works well to ensure a clean surface for the new strip.
Position the new heat strip, ensuring it is taut and properly seated in its designated clips or channels. Verify that it lies flat and is not twisted, as this can affect sealing performance. Use a strip specifically designed for your model.
Once the new heat strip is securely in place, plug your vacuum sealer back in. Perform a test seal on an empty bag to confirm that the new strip is functioning correctly and creating a strong, airtight seal.
Get our weekly buyer guide
Practical specs, not advice. Unsubscribe anytime.

This is such a crucial tip for anyone serious about home food preservation. I’ve always been diligent about cleaning my vacuum sealer, but I never thought about the heat strip wearing out. It makes perfect sense that continuous heating and cooling cycles would affect it. I’m going to add this to my yearly maintenance checklist to prevent any spoilage from air leaks.
I’m so glad I read this! I’ve been having issues with my FoodSaver not sealing properly, and I just assumed it was the bags. It never occurred to me that the heat strip could be the problem. I’m definitely going to check mine for visible damage and order a replacement. Thanks for the heads-up on this important maintenance!
Good info, but I wish there was more detail on how to actually replace the heat strip for different brands. My Weston sealer is a bit tricky to open up. I’ve noticed some inconsistent seals lately, and a slight burning odor, so I know I need to do this. Just wish it was a bit more of a step-by-step guide.
I’ve been using a vacuum sealer for years to store game meat and garden produce. I’ve definitely experienced weak or incomplete seals before and just thought my machine was on its last legs. Knowing that the heat strip is essential for generating the heat needed to melt and fuse the bag layers makes me realize I’ve probably just needed a simple part replacement all along. Good to know!